Create Webinars for Winter
On the 9th day of Advent, D365 raised the bar…
By telling me about the winter webinar!
Need to host an online meeting which has a large capacity for attendees? Microsoft Teams now has the option to host webinars. These enable you to invite up to 1,000 people to attend an interactive Teams meeting (and up to 10,000 to join on a view-only basis).
Following the effects of the pandemic, connecting online has increasingly become a large part of modern life. Having the ability to connect online is more important than ever! If you can’t make it home this holiday season or just want to connect with a larger group of others, Teams webinars can help. Learn how to set up Teams webinars by reading on!
Why use Teams Webinars?
The main benefit of Teams is that, as a Microsoft product, it can be seamlessly integrated with other applications like Outlook and Dynamics 365. If you already have a Microsoft License, Teams can be a far more cost-effective option than other third-party webinar apps on the market!
With Teams, you have the ability to customise the registration forms, present real-time polls and receive live reactions from attendees using emoticons. To control interaction (which is an asset in larger meetings) you’re also able to set certain attendee controls. These can include setting rules such as who can comment, whether attendees can share video, and more.
Creating a webinar
- From Teams, head to the Calendar and locate the ‘+ New Meeting’ button to the top right of the screen.
- Click the downward arrow to the side and then ‘Webinar’.

When you create a new webinar, the default registration requirement will be set to: ‘Require Registration: For Everyone’. If your administration haven’t altered any settings, you have the ability to change this to ‘None’, or ‘For people in your org’. Registration is a helpful feature for both internal and external events and offers attendees an element of control over which events / webinars they would like to attend. Read more about this here.
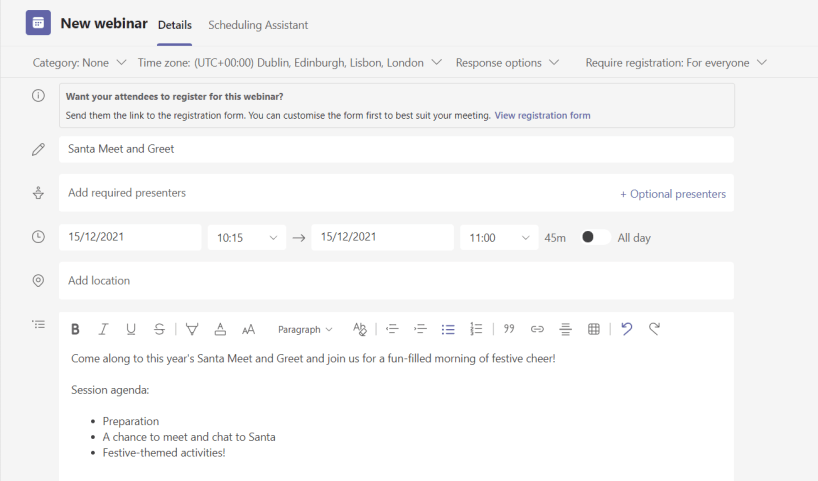
Filling out the details
There are two pages for the webinar for you to fill out. The first, that you’re initially presented with is for the webinar presenters only—attendees will not see it. This can be useful if you want to set a different start date for the meeting presenters than the arrival time of the attendees.
- Fill out the appropriate date / time.
- Fill out the details for new meeting with the contents:
- Click the button ‘View registration form’ to open the preview and customise. This is what your attendees will see when booking in.
The preview should look like this:

Customising the registration form
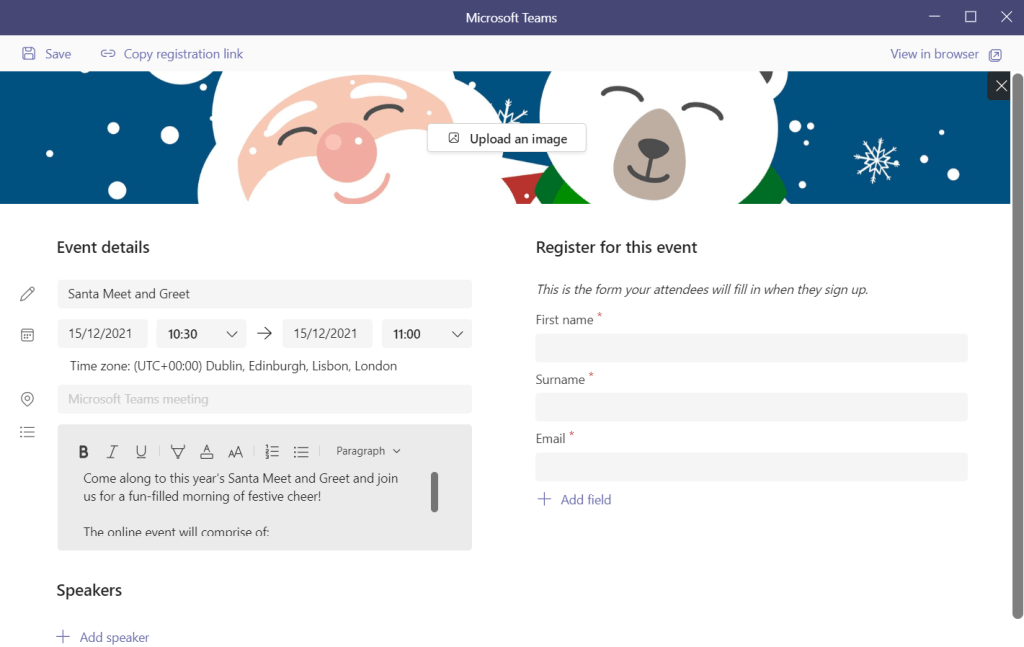
- Upload your chosen header image.
- Include a description of your webinar. This is the description that your attendees will read.
- Input the date and time your would like the event to run on. (Note: this can be different than the previous information you included. You should put in the time that you want your attendees to show up for).
- Choose if you would like to add in the names of who will be speaking.
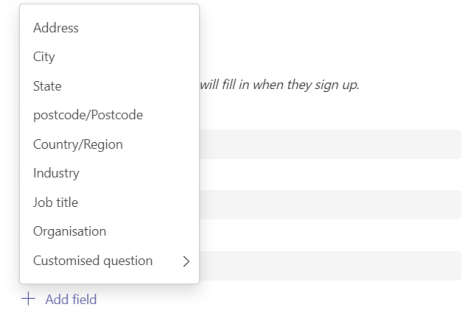
- Include any custom fields or even add in a customised question that attendees should answer upon registering for the event.
- Ensure you have hit ‘Save’ before closing this window.
- Once you’ve edited the registration form and are happy, you should close the window.
- Back on the first page, click ‘Send’ to send out the registration form for the webinar.
Editing the Meeting Options
After the initial event has been sent, you need to go back into it and edit the meeting options.
- Navigate to the event (you will find it scheduled in the Calendar).
- Click on the event and select ‘Edit’.
- At the top, find the tab that says ‘Meeting options’ and click it. This should open a window in your browser.

You’re able to edit the meeting options to your specifications and requirements. This is where you can select the presenters for your webinar and choose who is allowed to present.
Try it yourself!
If you would like to see what the registration form looks like for attendees, click the link here and see a live version of the example! Please note: the form is for test purposes only so you can see how the registration form for webinars appears for the attendees.
Micro Office Advent
Teams webinars can be a great way of connecting to a large group! For more tips and tricks like this make sure to take a look at our Micro Office Huddle group where we share free bits of information about all-things technology!
This blog is the seventh in our Micro Office Advent! Make sure to check back on the page each day for more fun things just like this!
For more on how Microsoft 365 Business Voice can help keep you connected, read yesterday’s Advent post! Click here for the next post in the series.
When will the Micro Office Huddle run?
The huddles will run on Tuesdays from 08:30 – 10:00. Join our Facebook group and sign up to join the huddle!
Remember you can also follow us / keep up to date at…. Facebook / Linked In / Blogs or sign up for our newsletter D365 Byte Sized.
2 Comments
Comments are closed.