Create Stunning Surveys with Microsoft Forms
On the 7th day of Advent, time management was transformed…
By using Microsoft Forms!
Want to learn to create surveys so you can plan the best office festivities? Microsoft Forms can help!
Why use Microsoft Forms?
You’re able to create surveys, quizzes and polls easily and efficiently with Microsoft Forms! Stylise the appearance of the form to suit your needs and brand and share it with others!
This is a great way of collating information in a matter of minutes. For Office 365 users, when the results have been submitted, you’re able to use the built-in-analytics to assess the results. The data can then be shared to Excel for a deeper insight through the created charts and graphs.
Creating your own form
Want to create your own holiday survey to find out how the office is feeling about the festivities? Then follow the steps below!
- Open Microsoft Forms.
- Select ‘New Form’. This will open a blank form for you to edit.
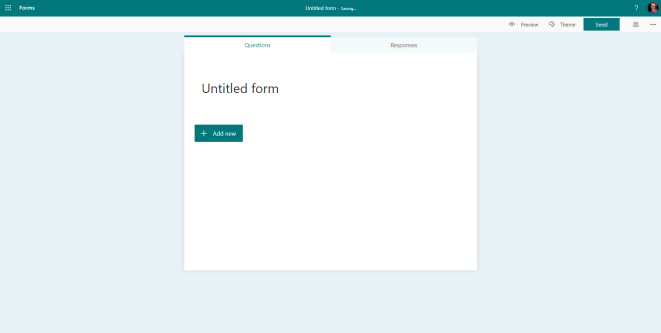
- Enter your title and description in the fields provided.
- Click ‘+ Add New’ to add a new question and from here, select the type of question you would like to create.
- You have the choice of creating a ‘Choice’ question, ‘Text’, ‘Rating’, ‘Date’, ‘Ranking’, ‘Likert’, ‘File Upload’, ‘Net Promoter Score’, or a ‘Section’.
- Write your questions and personalise by clicking the ‘Theme’ button located to the top right of your screen.
Personalising the form
You’re able to personalise how your form appears by editing the theme. This is great for branding, or even adding a festive feel to your office!
Microsoft has a pre-set selection of colours and cartoons that can jazz up the style of your form. If you have a particular style in mind, create it by selecting the final, ‘Custom’ option.
Keep checking to see how your form will look by hitting the ‘Preview’ option located in the top Ribbon.
Sharing your form
Share your form with others and collect their responses!
- To share your form, navigate to the ‘Send’ button to the top right of the Ribbon.
- From the drop-down, select who is able to respond (I’ve set the form so that anyone can respond).
- Then, you have the option of how you would like to send the form out. The simplest method is to copy the link provided.
Follow this link to see how the form I’ve created appears and have a go at answering the questions to see how everything works!
You don’t have to wait for everyone to complete your form before you’re able to see the results. Instead, you can see the answers arrive in real-time by selecting the ‘Responses’ tab in the editor.
See your responses
Microsoft Forms takes your data and filters it into easy-to-view graphs and charts. This allows you to view your data in one go and easily condense the answers. As you can see, under the results of each questions is a button called ‘More Details’. By clicking this, you will be able to see the names of those who have answered and what they selected. In this case, the names on the results have been anonymised.
The ‘Insights’ button provides a deeper look into the results and offers percentages of the selected answers where applicable. Have a look around and see the different ways Forms consolidates the collected data by creating your own form!
Micro Office Advent
Create personalised forms, surveys, polls, and questionnaires using Microsoft Forms! For more tips and tricks like this make sure to take a look at our Micro Office Huddle group where we share free bits of information about all-things technology!
This blog is the fifth in our Micro Office Advent! Make sure to check back on the page each day for more fun things just like this!
Read yesterday’s Advent post on how Microsoft Maths Solver can help! To read the next blog in the series, click here.
When will the Micro Office Huddle run?
The huddles will run on Tuesdays from 08:30 – 10:00. Join our Facebook group and sign up to join the huddle!
Remember you can also follow us / keep up to date at…. Facebook / Linked In / Blogs or sign up for our newsletter D365 Byte Sized.
1 Comment
Comments are closed.